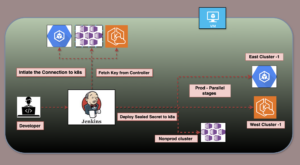
Disk space issues on a Jenkins controller machine can cause a range of problems from job failures to performance degradation and can even bring down the Jenkins service entirely. Here are steps to troubleshoot and resolve disk space issues on a Jenkins controller
Automatically via Jenkins
Jenkins itself can be configured to “wipe out” the workspace before a build starts. This can be set in the job configuration under Build Environment by checking the option “Delete workspace before build starts”. Using this option ensures that the deletion is handled gracefully by Jenkins.
Identify the Space Usage
Check the overall disk usage to see if the disk is indeed full:
df -h
Identify directories consuming most of the disk space using a command like
du -sh /var/* | sort -hr | head -10
For more detailed investigation, especially within the Jenkins directories:
du -sh /var/lib/jenkins/* | sort -hr | head -10
Clean Up Workspace
Jenkins workspaces can consume a significant amount of disk space
- Clear old workspaces: Jenkins does not automatically clean up old workspaces. You can manually delete them or use a plugin like the Workspace Cleanup Plugin.
du -sh /var/tmp/*/workspace/* | sort -hr | head -10 | xargs -p rm
List and Confirm the Files
It’s important to first confirm which files will be affected. Use the find command to locate the files and grep if needed, though in this case, find with the name filter should suffice
find . -type f -name "*cleanup*" | head -10
find . -type f -name "*cleanup*"searches for files in the current directory and subdirectories that contain “ws-cleanup” in their name.head -10filters this list to just the first 10 results
Delete the Files
Once you have confirmed that the files listed are the ones you want to delete, use the following command to delete them
find . -type f -name "*cleanup*" | head -10 | xargs rm
This command breaks down as follows:
find . -type f -name "*cleanup*"again generates the list of files.head -10picks the top 10 files from this list.xargs rmtakes the list of filenames from the pipe and passes them as arguments torm, which deletes them.
du -sh /var/tmp/*/workspace/*:
du (disk usage) is the command used to estimate file space usage.
- The
-soption provides a summary for each specified directory, not showing sizes for subdirectories individually. - The
-hoption formats the output to be human-readable (e.g., showing sizes in KB, MB, or GB). /var/tmp/*/workspace/*is the path where the command looks for directories. It uses shell globbing to match all directories inside any/workspace/directory that itself is in any directory under/var/tmp/.
The entire below command pipeline lists the sizes of directories at specified paths, sorts them to find the largest ones, logs the top 10 largest directories, and then prompts the user to potentially delete them. This command is useful for managing disk space, especially in environments where temporary or workspace directories can grow large and need regular cleaning
du -sh /var/tmp/*/workspace/* | sort -hr | head -10 | tee largest-directory.log | awk '{print $2}' | xargs -p rm
| sort -hr
- This pipes (
|) the output of theducommand to thesortcommand. - The
-hoption insortenables human-readable number sorting (i.e., recognizing number size with suffixes like K, M, G). - The
-roption sorts the results in descending order (largest first).
| head -10:
- This pipes the sorted list to the
headcommand, which by default outputs the first 10 lines. Here, it’s used to get the top 10 largest directories.
| tee largest-directory.log
- The
teecommand reads from standard input and writes to standard output and files. - This part of the command writes the top 10 largest directories to a file named
largest-directory.logwhile still passing the output forward for further processing.
| awk '{print $2}'
- This pipes the output to
awk, which is used for pattern scanning and processing. awk '{print $2}'prints the second field of each input line, which corresponds to the path of the directories (sinceduoutputs size followed by path).
| xargs -p rm
xargsbuilds and executes command lines from standard input.-pprompts the user for confirmation before executing each command.rmis the command to remove files or directories.- This part tries to remove the directories that were just listed, but it will ask for confirmation due to the
-pflag inxargs.
If cleanup is not enough, consider increasing the disk space:
- Add more storage to the Jenkins server if running on-premise.
- Resize the volume if running on a cloud platform like AWS, followed by file system resizing.
Monitoring the Disk space Using Cloud Watch
Connect to your EC2 instance via SSH & Install the CloudWatch Agent
sudo yum install amazon-cloudwatch-agent -y
Create the agent configuration file using the wizard or by editing manually. You can generate a basic configuration and then modify it
sudo /opt/aws/amazon-cloudwatch-agent/bin/amazon-cloudwatch-agent-config-wizard
Follow the prompts to set up basic monitoring, including disk metrics. Opt for the advanced setup to customize disk path monitoring (e.g., /var, /).
Start the CloudWatch agent
sudo /opt/aws/amazon-cloudwatch-agent/bin/amazon-cloudwatch-agent-ctl -a fetch-config -m ec2 -c file:/opt/aws/amazon-cloudwatch-agent/etc/amazon-cloudwatch-agent.json -s
Create an SNS Topic for Notifications
- Open the Amazon SNS console at https://console.aws.amazon.com/sns/.
- Click Topics > Create topic.
- Choose Standard type, enter a Name and Display name, and click Create topic.
- Click on the newly created topic, then click Create subscription.
- For Protocol, select Email, enter your Email address, and click Create subscription.
- Confirm the subscription by clicking the confirmation link sent to your email.
Create a CloudWatch Alarm
- Open the CloudWatch console at https://console.aws.amazon.com/cloudwatch/.
- In the navigation pane, click Alarms > Create Alarm.
- Click Select metric, go to CWAgent, then browse and select your disk metric (usually named
disk_used_percent). - Click the metric, then Select metric.
- Configure the metric and conditions:
- Statistic: Average
- Period: 5 minutes
- Threshold type: Static
- Set Condition to greater than or equal to the percentage you consider critical (e.g., 80%).
- Click Next.
- Under Notification, add a new notification:
- Alarm state trigger: In alarm
- Send notification to: Select your SNS topic.
Click Next, name your alarm, add a description if desired, and click Create alarm.
Conclusion
Regularly monitoring and maintaining the disk space on your Jenkins controller is crucial to prevent build failures and ensure smooth operation. Implementing a combination of manual checks, automated cleanup scripts, and monitoring will help manage disk resources effectively.